Install Instructions
Removable Bollards
Parts:
– Removable Bollard
Tools Required:
– Concrete Core Drill (Minimum 6” wide)
– Concrete for filling (for existing concrete)
General Install Steps
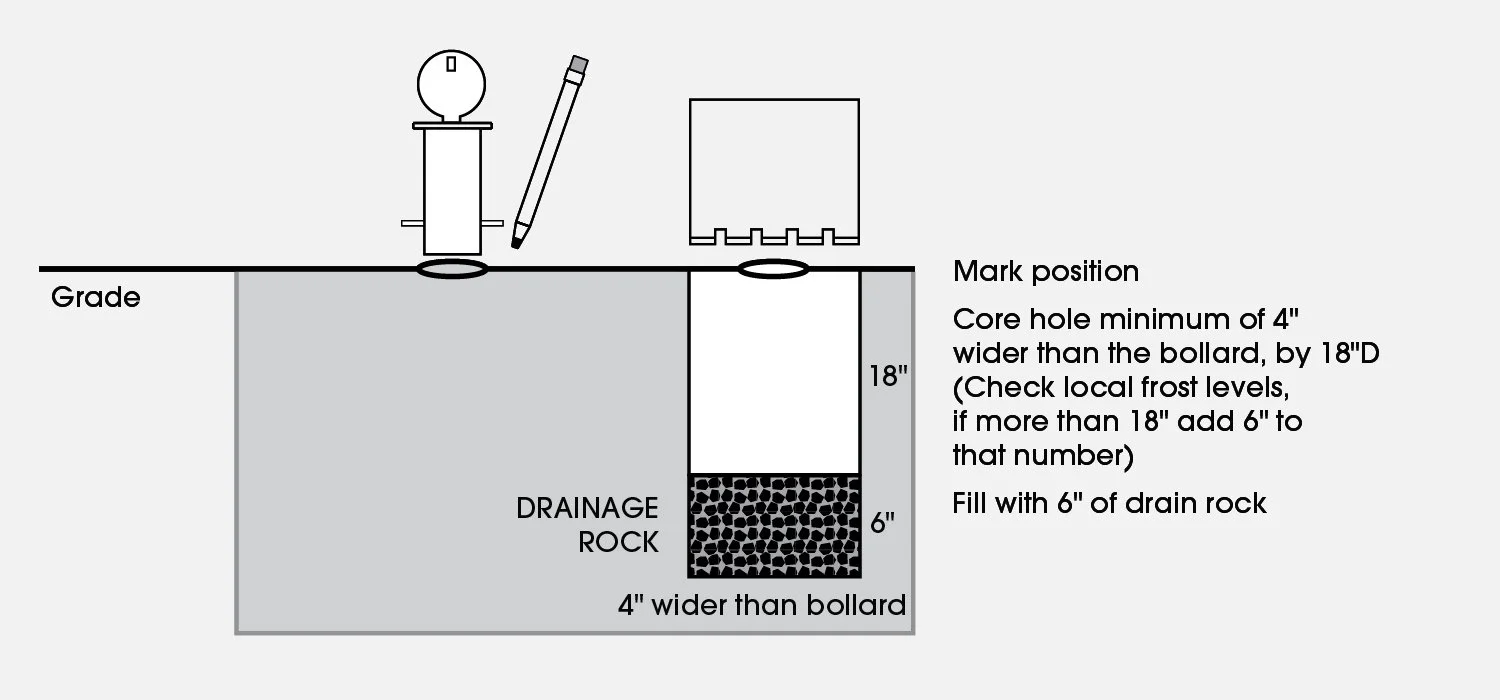
Place the bollard base (receiver) in the location, use the spec sheet drawing as a guide for spacing.
Use a marker or pencil to outline the post on the install surface.
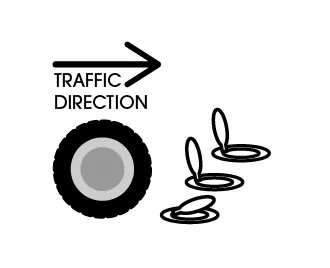
IMPORTANT: Be certain to set hinges toward oncoming traffic.
– If hinges face away from traffic and are left open, vehicle tires or bollard flanges may be damaged
For Existing Concrete
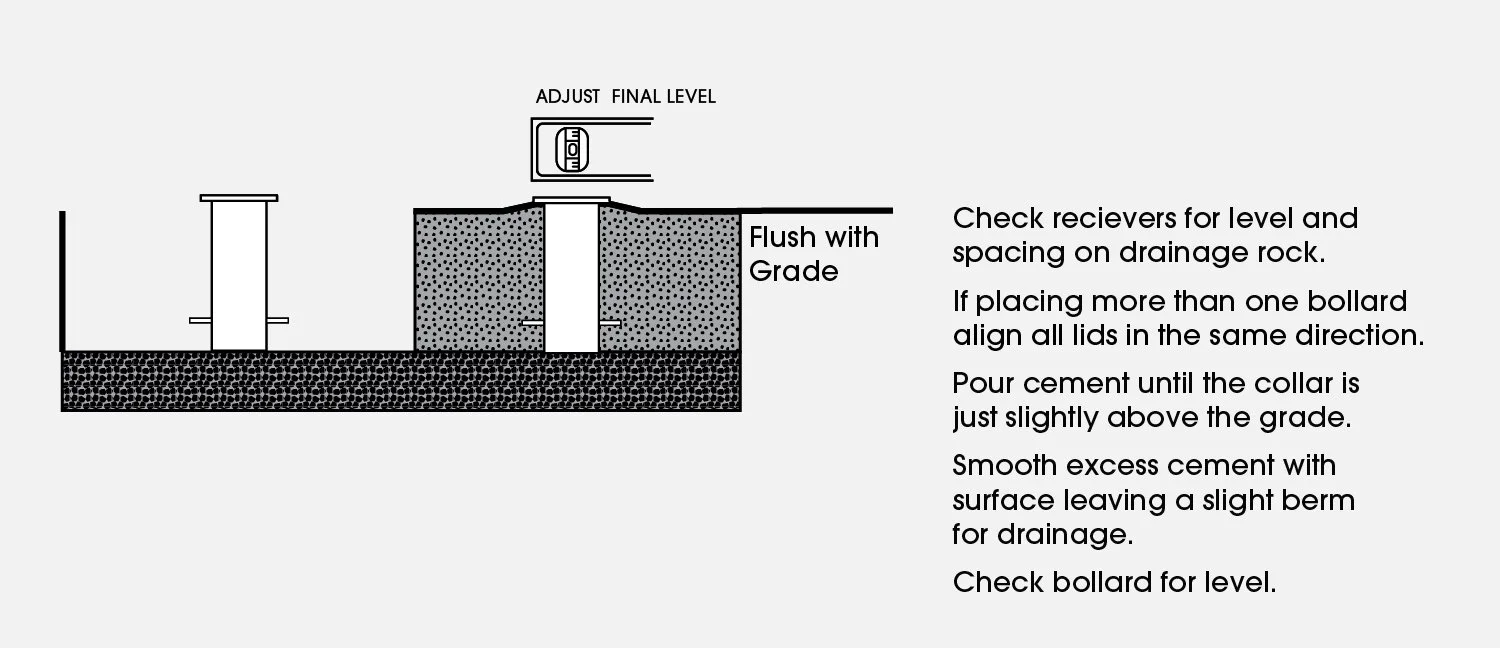
Core hole min. of 4" wider than the receiver (to clear the pins), by 6” deeper than the receiver (frost depth determines receiver length for drainage).
Fill the hole with 6” of gravel and compact. Dry fit the receiver and check for level and flush with grade, compact soil if needed.
Fill the cored holes around the level receiver with wet concrete or epoxy.
Smooth excess around each bollard, leaving a slight berm for drainage, check final level, adjust if needed.
IMPORTANT: Be certain to set hinges toward oncoming traffic.
– If hinges face away from traffic and are left open, vehicle tires or bollard flanges may be damaged
IMPORTANT: Be certain to set hinges toward oncoming traffic.
– If hinges face away from traffic and are left open, vehicle tires or bollard flanges may be damaged
For Wet Concrete
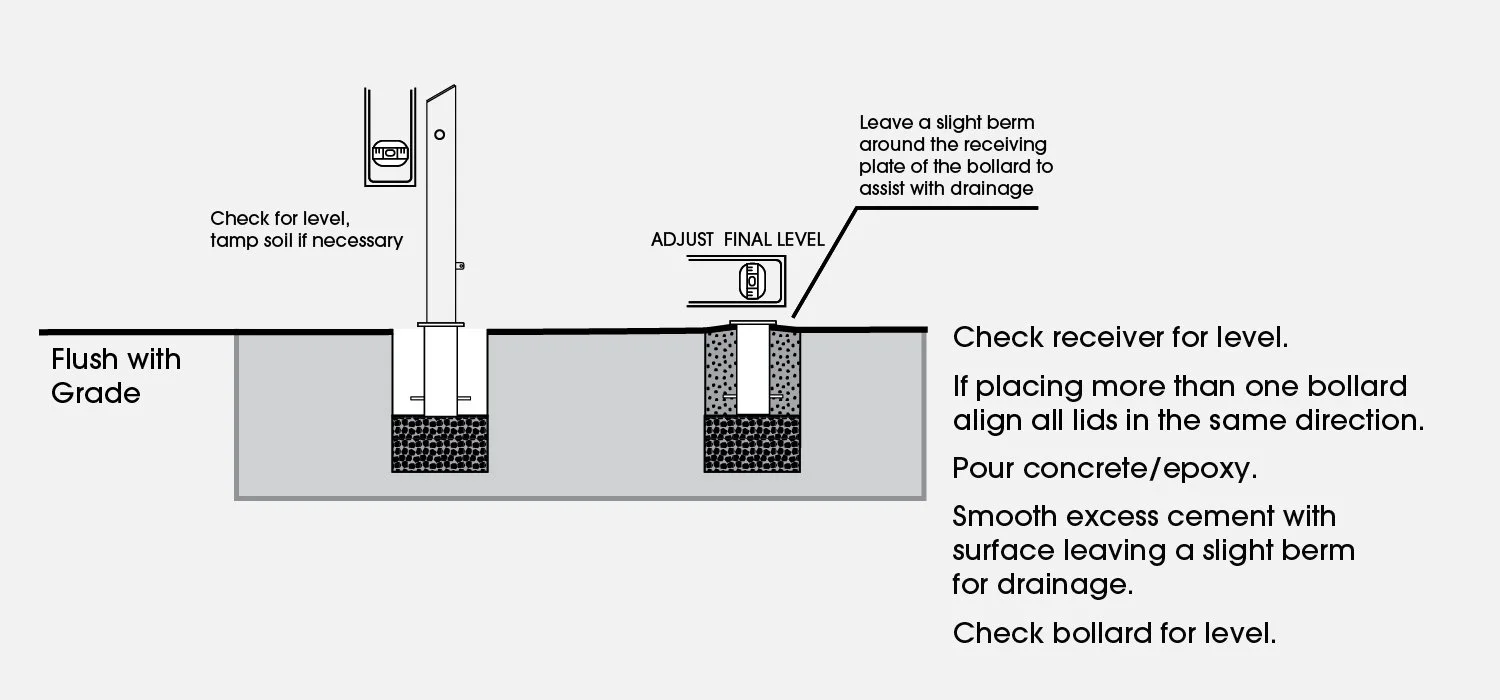
After locating proper spacing, Dry fit the receiver and check for level. Compact soil if necessary.
Pour cement around level receiver.
Smooth excess around each bollard, leaving a slight berm for drainage, and check final level, adjust if needed.
IMPORTANT: Be certain to set hinges toward oncoming traffic.
– If hinges face away from traffic and are left open, vehicle tires or bollard flanges may be damaged
IMPORTANT: Be certain to set hinges toward oncoming traffic.
– If hinges face away from traffic and are left open, vehicle tires or bollard flanges may be damaged